The most Cost-Effective way to make your home more comfortable and energy efficient is by sealing AIR LEAKS and adding ATTIC INSULATION.
Sealing and insulating your home is one of the most cost-effective ways to make your home more comfortable and energy efficient. Properly insulating your home not only reduces heating and cooling costs, but also improves comfort, but first you must be sure your home is sealed from air leaks.
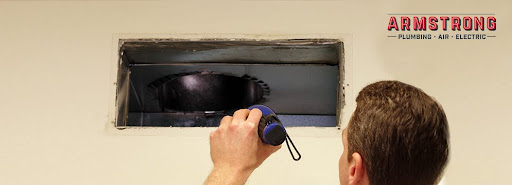
1. First, locate the Air Leaks in your home

More than any other time of year, air leaks in your home are noticed in the winter. We often call these air leaks “drafts.” These drafts can be felt around windows and doors and are major sources of wasted energy. In most homes the most significant air leaks are hidden in the attic and basement. These are the leaks that significantly raise your energy bill and make your house uncomfortable. Locating these leaks can be difficult because they are often hidden under your insulation.
Here is a list of common household Air Leaks that you should look for in your home:
1. Behind kneewalls: (a short wall in a room with a sloped ceiling) Finished rooms built into attics often have open cavities in the floor framing under the side-walls or kneewalls. Even though insulation may be piled against or stuffed into these spaces, they can still leak air. Look for signs of dirty insulation to indicate air is moving through. Plug these cavities in order to stop air from traveling under the floor of the finished space.
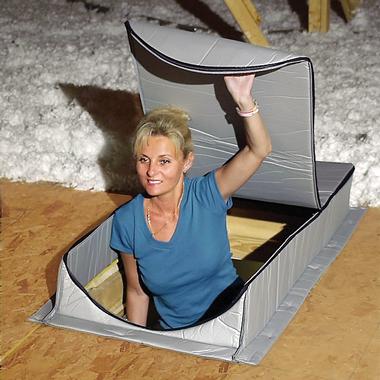
2. Attic hatch: Seal the access hatch with self-sticking weather stripping. If your hatch rests directly on the moldings, add 2-1/2 inch wide strips around the opening or consider using a newer product known as an attic tent. Attic Tent-Attic Door Insulation Covers are an easy to install and affordable covering for your attic door.
3. Wiring holes: Seal where penetrations are made through tops of walls with spray foam sealant.
4. Plumbing vent: Again, use spray foam sealant to seal the openings.
5. Open Soffit (the box that hides recessed lights): Dropped soffits may be filled or covered with insulation and hard to see. Push back the insulation and out of the soffits. Place this insulation back over the soffit once the stud cavities have been plugged and the soffits covered.
6. Recessed light: Recessed “can” lights (also called high-hats or recessed down lights) look great, but when they protrude into your attic space, they can make your home less energy-efficient. These recessed lights in a one-story house or in the ceiling of a second-story create open holes into your attic that allow unwanted heat flow between conditioned and unconditioned spaces.
7. Furnace Flue or Duct Chaseways (the hollow box or wall feature that hides ducts): The opening around a furnace or water heater flue or chimney can be a major source of warm air moving in the attic.
8. Basement Rim Joists (where the foundation meets the wood framing)
9. Windows and Doors: Add weather striping where necessary.
10. Heating and Cooling Ducts: Leaky and poorly-insulated ducts (especially in attics) severely compromise the performance of your heating and cooling equipment. Sealing and insulating your ducts can increase the efficiency of your heating and cooling system by 20% and greatly increase air flow.
Don’t worry about finding and sealing all the little holes in your attic; your biggest savings will come from plugging the large ones. Once in the attic, locate the areas where leakage is likely to be greatest: where walls (inner and outer) meet the attic floor, dropped soffits (dropped-ceiling areas), and behind or under attic kneewalls. Look for dirty insulation—this indicates that air is moving through it. This is the result of filtering dusty air from the house. In cold weather, you may also see frosty areas in the insulation caused by warm, moist air condensing and then freezing as it hits the cold attic air. In warmer weather, you’ll find water staining in these same areas.
Even if you have enough insulation in your attic, sealing attic air leaks will enhance the performance of your insulation and make your home much more comfortable.
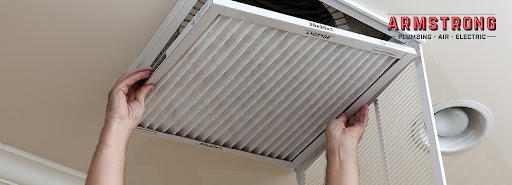
2. Check your Attic Insulation levels and add more if necessary.
The attic is the easiest place to add insulation to improve your comfort and the energy efficiency of your home.

Do I Have Enough?
No matter what kind of insulation you currently have in your attic, one quick way to determine if you need more is to look across the span of your attic. If your insulation is just level with or below your floor joists (i.e., you can easily see your joists), you should add more. If you cannot see any of the floor joists because the insulation is well above them, you probably have enough and adding more may not be cost-effective. It is important that the insulation be evenly distributed with no low spots; sometimes there is enough insulation in the middle of the attic and very little along the eaves. If your attic insulation covers your joists and is distributed evenly, you probably have enough.
How Much Should I Add?
Insulation levels are specified by R-Value. R-Value is a measure of insulation’s ability to resist heat flow. (The higher the R-Value, the better the thermal performance of the insulation) The recommended level for most attics is to insulate to R-38 or about 10 to 14 inches, depending on insulation type.
Installing Rafter Vents
To completely cover your attic floor with insulation out to the eaves you need to install rafter vents (also called insulation baffles). Complete coverage of the attic floor along with sealing air leaks will ensure you get the best performance from your insulation. Rafter vents ensure the soffit vents are clear and there is a channel for outside air to move into the attic at the soffits and out through the gable or ridge vent.
Adding insulation to your home is a sound investment and likely will pay for itself quickly in reduced utility bills.
Caution: Check for Carbon Monoxide to keep your house safe. After making energy improvements that result in a tighter house, there can be an increased opportunity for CO to build up if your gas-burning appliances are not venting properly. Click here to Schedule a HVAC Specialist to check your combustion appliances (gas- or oil-fired furnace, water heater, and dryer) for proper venting. For more information on Carbon Monoxide Poisoning, click here.